
Are you tired of dealing with leftover food scraps cluttering your kitchen sink? Installing or maintaining a kitchen disposal can make your life so much easier.
But what tools do you actually need to get the job done right? Knowing exactly which tools to have on hand can save you time, frustration, and even money. You’ll discover the essential tools that will help you install, fix, or upgrade your kitchen disposal quickly and safely.
Keep reading to find out how to tackle this task like a pro, even if you’re not an expert!

Credit: www.insinkerator.com
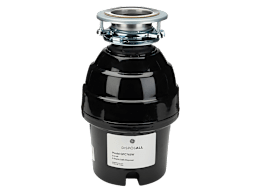
Types Of Kitchen Disposal Systems
Kitchen disposals help remove food waste quickly. They fit under the sink and grind scraps into small pieces.
Choosing the right disposal system depends on your kitchen needs and preferences. There are different types available.
Continuous Feed Disposals
Continuous feed disposals run while you feed food waste into them. You turn them on and add scraps as you work.
This type is common in many homes. It works well for everyday kitchen waste and is easy to use.
Batch Feed Disposals
Batch feed disposals work only when the cover is locked in place. This adds safety by preventing accidents.
- Run only when sealed
- Safer for families with children
- Good for controlled disposal
- Typically quieter than continuous feed
High-speed Vs. Standard Motors
| Motor Type | Speed | Power | Noise Level | Best Use |
| High-Speed | Fast | More powerful | Quieter | Heavy kitchen use |
| Standard | Moderate | Less powerful | Louder | Light to medium use |
Essential Tools For Installation
Installing a kitchen disposal requires some basic tools. These tools help make the job easier and safer.
Knowing what tools to use can save time and avoid damage to your plumbing.
Plumbers Putty And Sealants
Plumbers putty and sealants create a watertight seal around the disposal. This prevents leaks under the sink.
- Plumbers putty is soft and easy to mold around parts.
- Silicone sealants provide a strong, flexible bond.
- Use putty on drain openings and flange areas.
- Sealants work well on joints that need extra protection.
Screwdrivers And Wrenches
Screwdrivers and wrenches are needed to tighten screws and bolts. They hold the disposal firmly in place.
| Tool | Use |
| Flathead screwdriver | Remove and tighten screws |
| Phillips screwdriver | Secure mounting screws |
| Adjustable wrench | Tighten nuts and bolts |
Pipe Wrenches And Channel Locks
Pipe wrenches and channel locks help grip and turn pipes. They are essential for connecting and disconnecting plumbing parts.
- Pipe wrenches provide a strong grip on round pipes.
- Channel locks adjust to fit different pipe sizes.
- Use these tools to remove old piping or tighten new parts.
Electrical Tools Needed
Installing a kitchen disposal requires some basic electrical tools. These tools help you handle wiring and ensure safety. Using the right tools makes the job easier and faster.
Below are key electrical tools you will need. Each tool has a specific role in the installation process.
Wire Strippers And Cutters
Wire strippers and cutters are essential for preparing electrical wires. They remove the insulation without damaging the wire inside. Cutters trim the wires to the needed length.
- Wire strippers come with different notch sizes for various wire gauges.
- Cutters help make clean, straight cuts quickly.
- Using these tools prevents wire damage and unsafe connections.
Voltage Tester
A voltage tester checks if the power is off before you start work. It helps avoid electric shocks. This tool confirms if wires are live or dead.
| Tool Type | Purpose | Safety Feature |
| Non-contact Voltage Tester | Detects voltage without touching wires | Prevents electric shock |
| Multimeter | Measures voltage, current, and resistance | Accurate diagnostics |
| Neon Voltage Tester | Lights up when voltage is present | Simple visual check |
Cord And Plug Options
Choosing the right cord and plug ensures your disposal connects safely to power. Some disposals come without cords, so you must add your own.
Common cord and plug options include:
- Three-prong cords for grounded outlets
- Two-prong cords for ungrounded outlets
- Direct wiring for permanent connection
Pick a cord that matches your kitchen outlet and local codes.
Maintenance And Repair Tools
Kitchen disposals need tools for upkeep and fixing. Using the right tools keeps them working well. Regular care stops big problems from starting.
This guide shows important tools for kitchen disposal maintenance. These tools help with repairs and cleaning tasks.
Hex Keys And Allen Wrenches
Hex keys and Allen wrenches fit into small screws in disposals. They help tighten or loosen parts during repair. These tools come in sets with different sizes.
Using the correct size prevents damage to screws. These tools are handy for removing jammed blades or opening the disposal casing.
- Used to loosen or tighten hex screws
- Help fix jammed disposal parts
- Come in various sizes for different screws
- Essential for small repairs and adjustments
Pliers And Drain Augers
Pliers grip and twist parts in the disposal. They are useful for pulling out stuck objects or bending wires. Drain augers clear clogs deep in the pipes.
Drain augers are long, flexible tools that reach blockages. Pliers come in many types, like needle-nose or slip-joint, for different jobs.
- Pliers remove stuck debris and hold parts
- Drain augers clear pipe clogs
- Needle-nose pliers reach tight spaces
- Slip-joint pliers adjust to different sizes
Cleaning Brushes And Deodorizers
Cleaning brushes scrub the inside of the disposal. They remove food buildup and grease. Deodorizers keep the disposal smelling fresh and clean.
Use stiff-bristled brushes for tough stains. Deodorizers come in powders, liquids, or tablets to stop bad odors.
- Brushes clean blades and walls
- Deodorizers remove bad smells
- Regular cleaning prevents clogs
- Keep the disposal fresh and safe
Safety Equipment For Kitchen Disposal Work
Working with a kitchen disposal can be risky without the right safety gear. Protecting yourself helps prevent injuries and accidents.
Using proper safety equipment makes the job safer and easier to complete. Always prepare before starting any disposal work.
Gloves And Eye Protection
Wear gloves to protect your hands from sharp objects and chemicals. Gloves also keep your hands clean and safe from germs.
Eye protection stops debris or splashes from hurting your eyes. Safety glasses or goggles are best for this task.
- Use thick, waterproof gloves
- Choose safety glasses that fit well
- Check gloves for holes before use
- Keep eye protection clean and scratch-free
Hearing Protection
Kitchen disposals can be loud when running or during repairs. Protect your ears from damage with hearing protection.
Use earplugs or earmuffs to reduce noise. This helps prevent long-term hearing problems.
- Choose comfortable earplugs or earmuffs
- Use hearing protection during noisy tasks
- Replace disposable earplugs regularly
- Store hearing gear in a clean, dry place
Proper Lighting And Workspace Setup
Good lighting helps you see clearly while working on the disposal. It reduces the chance of mistakes and injuries.
Keep your workspace clean and organized. Remove clutter to avoid accidents and make tools easy to reach.
- Use bright, focused lights above the sink area
- Clear the workspace of any unnecessary items
- Ensure the floor is dry and free of slips
- Have a sturdy stool or chair if you need to sit

Credit: www.amazon.co.uk
Choosing The Right Tools For Your Setup
Having the right tools makes kitchen disposal work easier. It helps you install and maintain the unit properly.
Different setups need different tools. Picking the right ones saves time and avoids damage.
Compatibility With Disposal Models
Not all tools fit every kitchen disposal model. Check your disposal’s brand and size first.
Some disposals need special wrenches or mounting tools. Using the wrong tool can cause problems.
- Measure the disposal’s mounting ring size
- Confirm if a hex wrench or screwdriver is needed
- Check if the disposal requires a specific installation tool
- Look for tools made for your disposal brand
Budget Considerations
Tools vary in price. Decide how much you want to spend before buying.
Cheap tools may work for small jobs. For regular use, consider spending more for durability.
- Set a clear budget for tool purchases
- Consider buying tool kits for multiple uses
- Buy only what fits your disposal needs
- Check for sales or deals on tools
Quality Vs. Cost Trade-offs
High-quality tools last longer and feel better to use. Low-cost tools may break easily.
Think about how often you will use the tool. For frequent use, quality is worth the cost.
- High-quality tools resist rust and wear
- Cheap tools may save money but wear fast
- Balance cost with how often you will use the tool
- Read reviews to judge tool durability
Credit: www.consumerreports.org
Frequently Asked Questions
What Tools Are Essential For Kitchen Disposal Installation?
Essential tools include a screwdriver, pliers, plumber’s putty, and a wrench. These tools help secure the disposal unit and connect plumbing safely.
How Do I Choose The Right Disposal Tool For My Kitchen?
Choose tools compatible with your disposal model. Check the manufacturer’s guidelines to ensure proper fit and avoid damage during installation or maintenance.
Can I Install A Kitchen Disposal Without Special Tools?
Basic tools like a screwdriver and wrench usually suffice. However, some models may require specialized tools for secure and safe installation.
What Maintenance Tools Are Needed For Kitchen Disposals?
A hex wrench, flashlight, and plunger are useful. They help clear jams, inspect the unit, and maintain smooth operation regularly.
Conclusion
Choosing the right tools makes kitchen disposal easier and safer. Basic tools like a wrench, screwdriver, and pliers help with installation and repairs. A flashlight can assist in tight spaces. Keep a bucket nearby to catch water spills. These simple tools save time and prevent damage.
Remember, proper care extends the life of your disposal. Stay prepared and handle tasks with confidence. Your kitchen cleanup will become quicker and less stressful. Small efforts lead to big results.