Are you tired of your kitchen counter cluttered with oil bottles everywhere? Finding the right bottle when you’re cooking can be frustrating and slow you down.
Imagine having your oil bottles neatly arranged, easy to grab, and taking up less space. You’ll discover simple and smart ways to organize your oil bottles so your kitchen feels more spacious and cooking becomes more enjoyable. Keep reading, and you’ll unlock practical tips that make a big difference in your daily routine.
Choosing The Right Storage Spot
Organizing oil bottles in your kitchen helps keep your space clean and efficient. Picking the best spot for storage protects the oils and makes cooking easier.
Consider where to place your oil bottles carefully. The right location keeps oils fresh and easy to reach while cooking.
Consider Kitchen Layout
Your kitchen layout affects where you can store oil bottles. Look for spots near your cooking area but out of the way of heavy traffic.
- Store oils near the stove or prep area for quick access
- Use cabinet shelves or small racks to save counter space
- Place oils where they do not block other items or workspace
- Choose spots that suit your cooking habits and kitchen flow
Avoid Heat And Light
Heat and light can spoil cooking oils. Keep your bottles in cool, dark places to keep oil fresh longer.
| Storage Spot | Heat Exposure | Light Exposure | Ideal for Oil Storage |
| Near Stove | High | Varies | No |
| Cabinet Away from Window | Low | Low | Yes |
| Pantry Shelf | Low | Low | Yes |
| Countertop by Window | Low | High | No |
Accessibility Matters
Make sure your oil bottles are easy to reach. This saves time and avoids spills while cooking.
- Place bottles at eye level or within arm’s reach
- Use lazy Susans or pull-out shelves for better access
- Keep frequently used oils in the front
- Label bottles clearly to find the right one fast
Credit: www.chasingfoxes.com
Selecting Suitable Containers
Organizing oil bottles in the kitchen starts with picking the right containers. Proper containers keep oils fresh and easy to use.
Choosing containers that protect oil from air, light, and mix-ups helps maintain quality and convenience.
Use Airtight Bottles
Airtight bottles stop air from entering and spoiling the oil. Air can make oil go bad faster.
Look for containers with tight lids or caps that seal well. This keeps oil fresh longer.
- Prevents oxidation
- Keeps oil flavor strong
- Stops dust and moisture
Opt For Dark Glass
Dark glass bottles protect oil from sunlight. Light can break down oil and change its taste.
Choose amber or green glass containers to block harmful light and keep oil fresh.
- Blocks UV rays
- Preserves oil nutrients
- Reduces spoilage
Labeling For Easy Identification
Label your oil bottles clearly. This helps you find the right oil quickly when cooking.
Use simple labels with the oil type and date opened. This keeps your kitchen organized.
- Write oil type (e.g., olive, sunflower)
- Add date opened
- Use waterproof labels or markers
Organizing Techniques
Keeping oil bottles tidy helps save space and makes cooking easier.
Try different ways to organize your oils for quick access and neatness.
Group By Usage Frequency
Sort oil bottles by how often you use them in cooking.
Keep the oils you use daily in front or on top shelves.
Store less-used oils in the back or lower shelves.
- Daily use oils like olive or vegetable oil
- Occasional oils like sesame or walnut oil
- Rarely used specialty oils
Use Shelf Organizers
Shelf organizers create extra layers or compartments on your shelves.
| Type of Organizer | Benefit |
| Tiered shelves | Allows bottles to be seen easily |
| Pull-out racks | Easy to reach bottles at the back |
| Divided trays | Keeps bottles from tipping over |
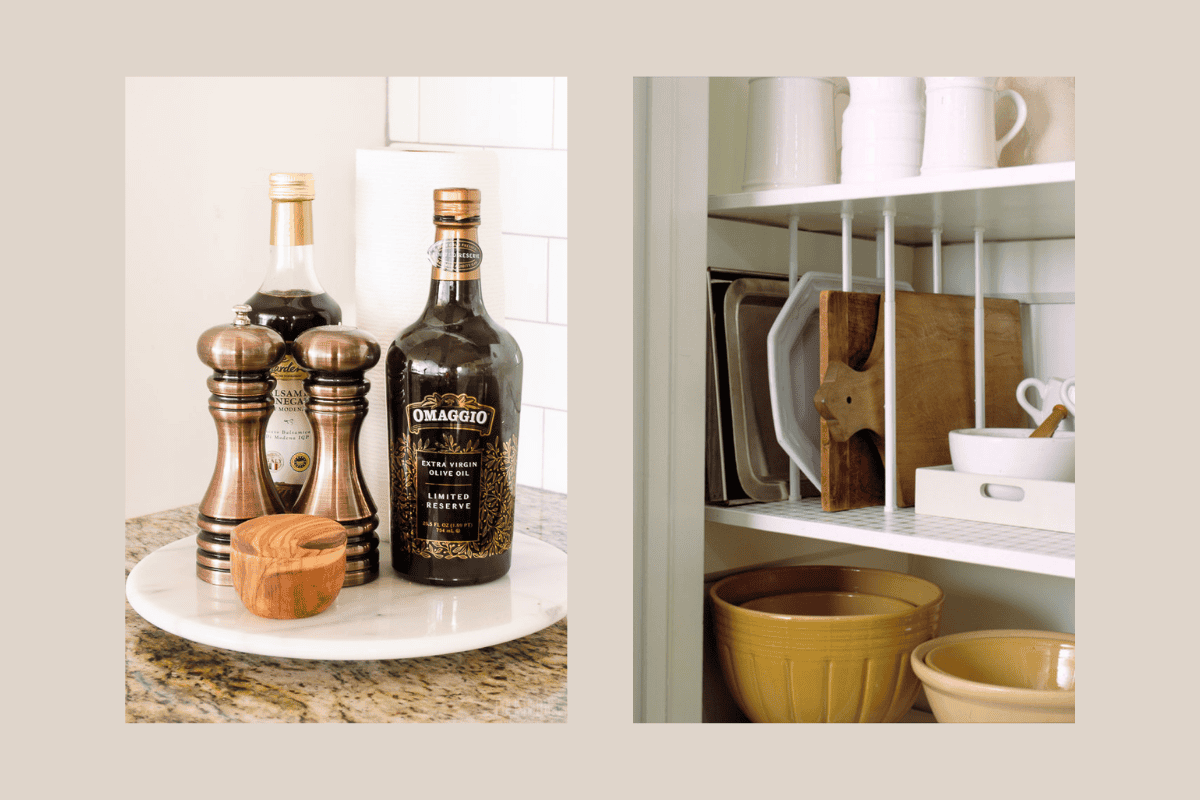
Implement Lazy Susans
A lazy Susan is a rotating tray to help reach bottles quickly.
Use a lazy Susan in corner cabinets or on countertops.
Place all oil bottles on it so you can spin to find the one you need.
Maintaining Freshness
Keeping your oil bottles fresh extends their flavor and quality. Proper storage helps avoid spoilage and waste.
Follow simple steps to organize and maintain the freshness of cooking oils in your kitchen.
Keep Bottles Sealed
Always close oil bottles tightly after use. Exposure to air causes oxidation, making oil go rancid faster.
- Use bottles with secure caps or lids
- Wipe bottle rims before sealing
- Avoid leaving bottles open during cooking
- Consider using smaller bottles for daily use
Monitor Expiry Dates
Check the expiration or best-before dates regularly. Using old oil affects taste and health.
| Type of Oil | Typical Shelf Life | Storage Tip |
| Olive Oil | 12-18 months | Store in dark glass bottles |
| Vegetable Oil | 12 months | Keep in cool, dark place |
| Coconut Oil | 18-24 months | Avoid heat and light |
Store Away From Moisture
Moisture can spoil oils and cause mold growth. Keep bottles dry and away from steam.
Tips to avoid moisture:
- Store oils in a cabinet, not near the sink
- Keep bottles on shelves, not countertops
- Dry the bottle surface before closing
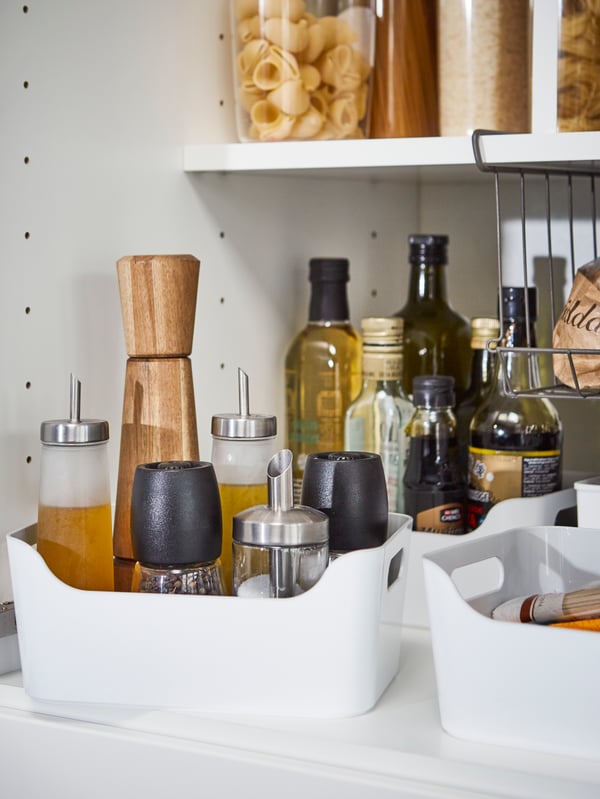
Creative Storage Ideas
Organizing oil bottles in the kitchen can save space and keep your cooking area tidy. Simple and creative storage ideas help you find the bottles quickly.
Try different methods that fit your kitchen style. Use tools and containers that make storing easy and neat.
Magnetic Racks
Magnetic racks hold oil bottles with metal lids or caps. Attach the rack to a metal surface or wall to save counter space.
This method keeps bottles visible and easy to reach. It also adds a modern look to your kitchen.
Wall-mounted Holders
Wall-mounted holders keep oil bottles off the counters and organized. You can find holders with slots or shelves for different bottle sizes.
- Install near the cooking area for quick access
- Use wooden or metal holders to match kitchen decor
- Choose holders with labels or tags for easy identification
Repurposed Containers
Use old jars, baskets, or boxes to store oil bottles. This is a budget-friendly way to organize your kitchen.
| Container Type | Best Use | Tip |
|---|---|---|
| Wooden crate | Large bottles | Add a liner for stability |
| Wire basket | Mixed bottle sizes | Place near stove |
| Glass jar | Small bottles | Group by type |

Credit: www.reddit.com

Credit: www.youtube.com
Frequently Asked Questions
How Can I Store Oil Bottles Neatly In The Kitchen?
Use a dedicated shelf or rack to keep oil bottles organized. Group similar oils together and label them for easy access. This prevents clutter and saves space, making your kitchen look tidy and efficient.
What Is The Best Way To Prevent Oil Spills?
Choose bottles with secure caps or pour spouts. Store bottles upright and avoid overfilling. Using drip trays or mats under bottles can also catch any leaks, keeping your kitchen clean and safe.
How Do I Keep Oil Bottles Easily Accessible While Cooking?
Place frequently used oils near your stove or food prep area. Use rotating racks or lazy Susans to quickly find and grab the right oil. This setup saves time and streamlines your cooking process.
Can I Use A Spice Rack For Oil Bottle Storage?
Yes, spice racks with adjustable shelves work well for small to medium oil bottles. They keep bottles visible and organized. Ensure the rack is sturdy enough to hold glass bottles safely.
Conclusion
Organizing oil bottles keeps your kitchen neat and safe. It saves space and makes cooking easier. Choose a spot that is dry and cool. Use racks, holders, or trays to keep bottles steady. Label bottles to find oils quickly. Regularly clean and check for leaks.
Small steps bring big changes in kitchen order. Enjoy a tidy kitchen that helps you cook better every day.