Imagine walking into your kitchen and being greeted by the fresh, invigorating scent of lemon or lavender. Now, imagine that same scent coming from a cleaner you made yourself.
Not only does it smell fantastic, but it’s also free from harsh chemicals. Sounds perfect, right? This is where essential oil kitchen cleaners come into play. They offer a natural, effective, and aromatic solution to keep your kitchen spotless. You’ll discover how to make your own essential oil kitchen cleaner that will transform your cleaning routine.
Dive in to learn the simple steps and ingredients that will revolutionize the way you clean, leaving your kitchen not just clean, but refreshingly fragrant.

Credit: itdoesnttastelikechicken.com
Benefits Of Essential Oil Cleaners
Crafting a kitchen cleaner with essential oils offers natural antibacterial benefits. These oils are non-toxic and safe for your family. Enjoy a fresh, clean kitchen without harsh chemicals.
When you think about cleaning your kitchen, you might imagine the harsh smell of chemical cleaners. But what if there was a more pleasant and natural way to keep your kitchen sparkling? Essential oil cleaners not only smell great but also offer several benefits for your home and health. Let’s explore why you should consider making the switch.1. Natural Antibacterial Properties
Essential oils like tea tree, eucalyptus, and lavender have natural antibacterial properties. They can effectively kill germs and bacteria without the need for harsh chemicals. This means a safer environment for you and your family, especially if you have little ones who love to explore.2. Non-toxic And Eco-friendly
Traditional cleaners often contain chemicals that can be harmful to your health and the planet. Essential oil cleaners, on the other hand, are non-toxic and biodegradable. By using them, you contribute to a healthier home and a cleaner earth.3. Customizable Scents
You can mix and match essential oils to create a scent that you love. Whether you prefer the calming scent of lavender or the invigorating aroma of lemon, the choice is yours. This personalization makes cleaning a more pleasant experience.4. Cost-effective Solution
Making your own essential oil cleaner can save you money in the long run. A few drops of essential oil go a long way, and you can often find them at a reasonable price. Plus, you can reuse a single bottle for numerous cleaning sessions.5. Versatile Uses
Essential oil cleaners aren’t just for countertops. You can use them to clean a variety of surfaces, from cutting boards to sinks. This versatility means you need fewer products cluttering your cabinets. Have you ever considered the impact of chemical cleaners on your indoor air quality? Essential oil cleaners can improve the air you breathe while keeping your kitchen clean. Why not give it a try and see how it transforms your cleaning routine?Choosing The Right Essential Oils
Selecting the perfect essential oils transforms your kitchen cleaner into a natural powerhouse. Opt for oils like lemon or tea tree. They effectively cut through grease and disinfect surfaces. Ensure your kitchen stays fresh and clean.
Choosing the right essential oils can elevate your kitchen cleaner. Essential oils not only add fragrance but also boost cleaning power. Each essential oil has unique properties. Some are antibacterial. Others are antiviral. Selecting the right oils can make cleaning more effective.Popular Essential Oils For Cleaning
Lemon oil is a top choice for cleaning. It cuts through grease easily. Its scent is fresh and invigorating. Tea tree oil is another excellent option. It has antimicrobial properties. Perfect for killing germs. Lavender oil is calming. It also has antibacterial benefits. Eucalyptus oil offers a crisp smell. It is great for disinfecting surfaces.Considerations For Scent And Effectiveness
Scents play a big role in choosing oils. Lemon and eucalyptus offer fresh aromas. Lavender provides a soothing scent. Think about the cleaning purpose. Tea tree oil is good for disinfecting. Lemon oil is better for grease. Consider allergies and sensitivities. Some scents may be too strong. Test oils in small areas first. Always mix with a carrier liquid. This ensures safety and effectiveness.Ingredients Needed
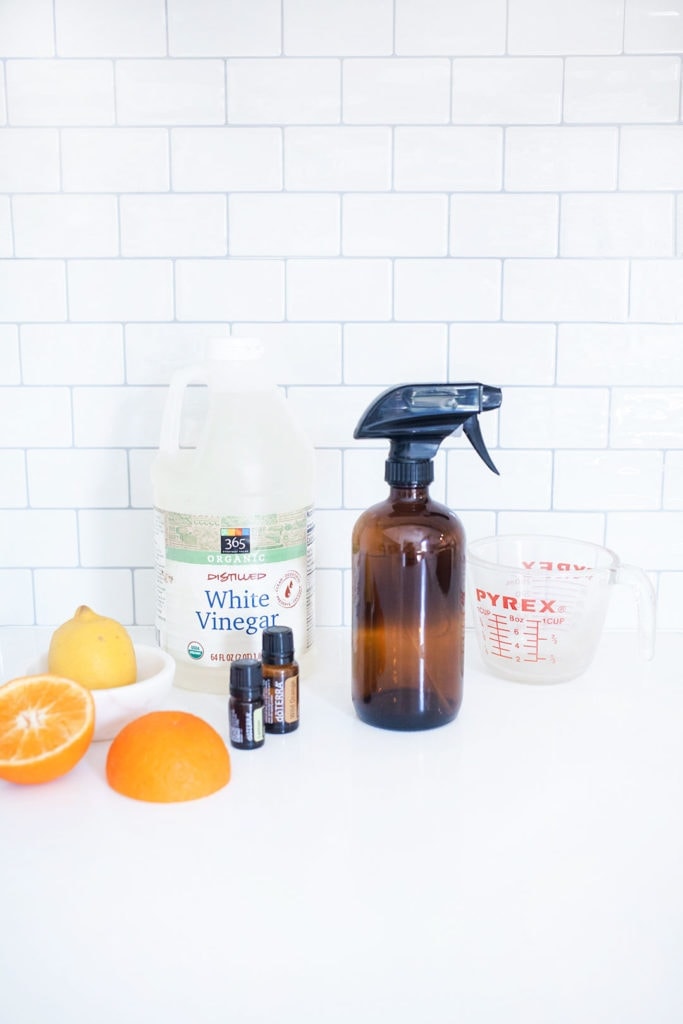
Crafting an essential oil kitchen cleaner requires simple ingredients. Gather vinegar, water, and essential oils like lemon or lavender. These elements combine to create a natural, effective solution for cleaning surfaces.
Creating your own essential oil kitchen cleaner is an empowering and eco-friendly way to keep your home sparkling. The ingredients are simple, yet effective, often found right in your pantry. Let’s dive into what you’ll need to get started.Essential Oils
Essential oils are the heart of your cleaner. They not only add a delightful scent but also have powerful cleaning properties. Lemon oil is perfect for cutting through grease and leaving a fresh aroma. Tea tree oil is known for its antibacterial qualities. Combine these with lavender or peppermint for a refreshing twist. Have you ever noticed how a particular scent can transform your mood? Pick oils that lift your spirits while you clean.Vinegar
White vinegar is your cleaning powerhouse. It effectively tackles dirt and grime without harsh chemicals. It’s also a great deodorizer. You might remember using vinegar in your grandmother’s kitchen—it’s a tried-and-true method that continues to work wonders. Mix vinegar with essential oils and watch it become your new cleaning ally.Water
Water acts as the base for your cleaner, diluting the vinegar and oils to make them safe for all surfaces. Use distilled water to ensure purity. Tap water can contain minerals that might leave streaks or spots. Think of water as the canvas for your cleaning masterpiece—simple, yet essential.Additional Natural Boosters
Adding a few natural boosters can enhance your cleaner’s effectiveness. Baking soda is great for scrubbing stubborn stains. A dash of salt can add grit for tough spots. How about a squeeze of citrus juice for extra freshness? Experiment with these boosters to find your perfect mix. What ingredients do you have in your pantry that could surprise you with their cleaning power? Creating your own essential oil kitchen cleaner is not only rewarding but also gives you control over what goes into your cleaning products. Embrace the process and enjoy a cleaner, fresher kitchen. Have you tried making your own cleaner before? How did it transform your cleaning routine?Tools Required
Creating an essential oil kitchen cleaner is simple and rewarding. But, having the right tools is crucial. Each tool helps ensure accurate measurements, smooth mixing, and safe storage. Let’s explore the essential tools needed for this DIY project.
Measuring Tools
Precision is key when making your kitchen cleaner. Use measuring cups and spoons. They help you get the right amount of each ingredient. This ensures your cleaner works effectively. Digital scales are also useful. They offer precise measurements for liquids and solids. Consistent measurements lead to a balanced mix.
Mixing Containers
Proper mixing requires the right containers. Choose a bowl or a jar with a wide mouth. This makes stirring ingredients easier. Glass containers are preferred. They do not react with essential oils. If using a plastic container, ensure it’s BPA-free. A funnel can help pour liquids without spills.
Storage Bottles
Once your cleaner is mixed, store it safely. Use dark glass bottles for storage. They protect the oils from light, preserving their potency. Amber or cobalt blue bottles are ideal. Make sure the bottles have tight-sealing caps. This prevents leaks and evaporation. Label each bottle with contents and date. It helps track freshness and usage.
Step-by-step Mixing Process
Creating a homemade essential oil kitchen cleaner is simple and rewarding. This natural alternative reduces chemical exposure and freshens your kitchen. Follow this step-by-step mixing process to craft a cleaner tailored to your needs.
Preparing The Ingredients
Gather the necessary supplies before starting. You need distilled water, vinegar, and essential oils. Opt for glass spray bottles to preserve the oils’ effectiveness. Ensure the bottles are clean and dry to prevent contamination.
Measure equal parts of distilled water and vinegar. Use a measuring cup for accuracy. Consider using a funnel to pour the liquids into the spray bottle easily.
Combining Essential Oils
Select oils with antibacterial properties, like tea tree or lemon. Lavender adds a pleasant aroma and is soothing. Add 20 drops of your chosen essential oils to the bottle.
Experiment with oil combinations. Mix two or three types to enhance fragrance and cleaning strength. Shake the bottle gently to blend the oils with the liquids.
Adjusting The Formula
Test the cleaner on a small kitchen area. Assess its cleaning power and scent. If desired, adjust the formula. Increase vinegar for tougher stains.
Add more essential oils for a stronger aroma. If too strong, dilute with more water. Keep experimenting until satisfied with the result.

Credit: www.edensgarden.com
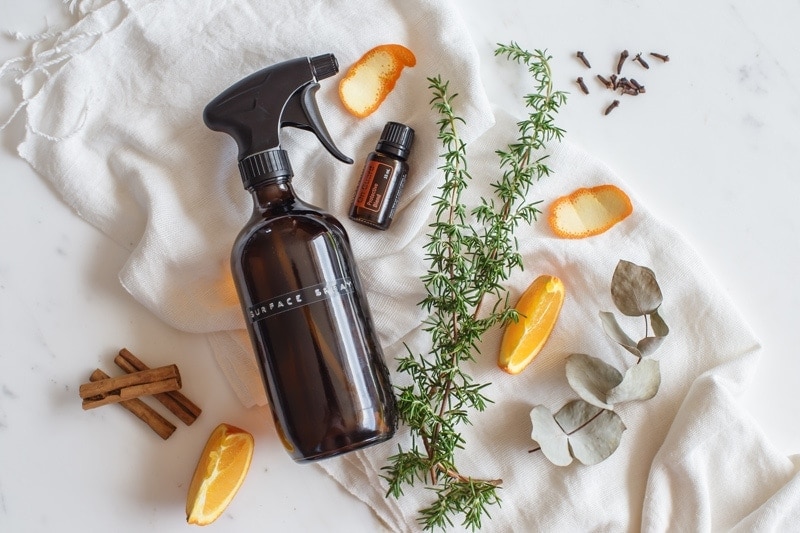
Application Methods
Using essential oil kitchen cleaner is easy and effective. This natural solution keeps your kitchen fresh and clean. Knowing the right application methods can enhance its effectiveness. Let’s explore how to apply it properly.
Surface Cleaning Techniques
Start by removing loose dirt and crumbs. Use a microfiber cloth for dusting. It catches particles and prevents scratches. Dampen the cloth with the essential oil cleaner. Wipe down countertops, focusing on stains and spills. For stubborn spots, let the cleaner sit for a few minutes. Then, scrub gently to lift the grime. Repeat as needed for a sparkling finish.
Effective Use Of Spray Bottles
Spray bottles make application simple and precise. Fill a clean spray bottle with your essential oil cleaner. Shake well before use to mix the ingredients. Spray directly onto surfaces from a few inches away. Aim for even coverage without soaking the area. For larger areas, work in sections. This ensures thorough cleaning and avoids wastage. After spraying, wipe with a cloth or sponge. The result? A fresh and hygienic kitchen.
Safety Tips
Creating your own essential oil kitchen cleaner can be fun and effective. But safety should always come first. Essential oils are potent. They require careful handling and storage. Follow these safety tips to ensure a safe cleaning experience.
Handling Essential Oils
Always use gloves when handling essential oils. They can irritate the skin. Dilute oils properly before use. Undiluted oils can be too strong. Use a carrier oil for dilution. Measure carefully to avoid accidents. Avoid contact with your eyes and mouth. If contact occurs, rinse immediately with water. Keep essential oils away from children and pets. They can be harmful if ingested.
Proper Storage
Store essential oils in a cool, dark place. Light and heat can degrade them. Use glass containers for storage. Essential oils can react with plastic. Ensure bottles are tightly sealed. This prevents evaporation and maintains potency. Label all bottles clearly. Include the oil name and dilution ratio. Keep oils out of reach of children. Safety should always be your priority.
Credit: ascensionkitchen.com
Maintenance And Storage
Maintaining and storing your homemade essential oil kitchen cleaner is crucial for its effectiveness and safety. You’ve put effort into making a cleaner that’s both natural and efficient, so let’s ensure it stays that way. Proper storage can extend its shelf life and keep its potency intact, all while ensuring your kitchen sparkles with each use.
Shelf Life Considerations
Essential oil kitchen cleaners generally have a decent shelf life, but they aren’t immune to expiration. Over time, the oils can lose their potency, affecting the cleaner’s performance. Most homemade cleaners last up to six months, but it’s wise to make smaller batches to maintain freshness.
Have you ever found an old cleaning product that smells off? That’s often a sign it’s past its prime. Regularly check your cleaner for any unusual changes in scent or appearance.
Storage Conditions
Storage plays a pivotal role in maintaining the effectiveness of your essential oil cleaner. Keep your cleaner in a cool, dark place, away from direct sunlight. Exposure to heat and light can degrade the oils, reducing their cleaning power.
Consider using amber glass bottles, which offer protection from light. Have you noticed how many commercial products use dark bottles? It’s for the same reason—preservation.
What’s your current storage setup for cleaning supplies? If it’s a sunny windowsill or near your stove, it might be time for a change. A cupboard or pantry shelf might be a better option, ensuring your cleaner stays effective.
Taking the time to store your cleaner properly can mean fewer refills and more effective cleaning sessions. How do you plan on adjusting your storage habits for better results?
Troubleshooting Common Issues
Troubleshooting common issues with homemade essential oil kitchen cleaner is key. Ensuring your cleaner works effectively involves understanding possible pitfalls. Some users encounter problems with scent or cleaning power. Let’s dive into solutions.
Addressing Scent Problems
Scent issues are common with essential oil cleaners. Sometimes, the fragrance is too strong. In that case, reduce the essential oil drops. Diluting the mixture with water can also help. If the scent fades too quickly, choose oils with lasting aromas. Citrus and eucalyptus are good options. They maintain their fragrance longer than others.
Effectiveness Adjustments
If your cleaner isn’t effective, adjust the oil concentration. Increase the essential oil by a few drops. This can boost the cleaning power. Ensure you’re using high-quality oils. Poor quality oils may not clean well. For stubborn grime, add a bit of vinegar. It enhances the cleaner’s power. Test on a small area first to avoid damage.
Frequently Asked Questions
How To Make A Household Cleaner With Essential Oils?
Mix 1 cup water, 1 cup white vinegar, and 20 drops of essential oil. Use oils like lemon, lavender, or tea tree for fragrance and antibacterial properties. Pour into a spray bottle and shake well. This DIY cleaner is eco-friendly and effective for surfaces.
What Is The Best Homemade Kitchen Surface Cleaner?
A mix of vinegar, water, and lemon essential oil makes an effective kitchen surface cleaner. Combine equal parts vinegar and water, then add a few drops of lemon oil. This solution cleans surfaces, fights bacteria, and leaves a fresh scent.
Always test on a small area first.
How To Make A Homemade Disinfectant Spray The Kitchen?
Mix equal parts of water and white vinegar in a spray bottle. Add 10 drops of essential oil for fragrance. Shake well before use. Spray on surfaces and wipe with a clean cloth to disinfect your kitchen effectively. Avoid using on granite or marble countertops.
What Essential Oils Are Good For Cleaning Countertops?
Lemon, tea tree, and lavender essential oils effectively clean countertops. They possess antimicrobial properties, ensuring a hygienic surface. Mix a few drops with water or vinegar for an eco-friendly cleaning solution. These oils leave a fresh scent, enhancing your kitchen environment while maintaining cleanliness.
Conclusion
Creating your own essential oil kitchen cleaner is simple. It’s effective and safe. Plus, you avoid harsh chemicals. Fresh scents bring joy to cleaning tasks. You get a clean kitchen and a fresh aroma. Start with basic oils like lemon or lavender.
Mix them with water and vinegar. Your surfaces will sparkle. Enjoy a cleaner kitchen and a healthier home. Feel proud. You’ve made a smart choice. Natural solutions make cleaning easy and pleasant. Try this method, and see the difference. Cleaner kitchens.
Happier homes. Simple and satisfying.