Imagine walking into your kitchen and feeling an instant sense of organization and ease. Picture every pot, pan, and utensil within arm’s reach, neatly stored in a space that looks as good as it works.
If your kitchen island is currently more of a cluttered countertop than a functional powerhouse, you’re not alone. Many kitchens suffer from the same lack of storage solutions. But what if you could transform it into the ultimate storage hub with just a few DIY tweaks?
You’ll discover simple yet effective ways to maximize your kitchen island’s storage potential. You’ll learn how to add practical storage solutions without breaking the bank or needing a professional. With a little creativity and some basic tools, you can revolutionize your kitchen space, making it a pleasure to cook, entertain, and live in. Dive in to find out how you can make your kitchen island not only a centerpiece of design but a marvel of functionality.
Assessing Kitchen Space
Assessing the kitchen space is crucial for adding storage to a kitchen island. A well-planned space ensures that your kitchen functions smoothly. Start by examining the kitchen’s layout and existing storage options.
Evaluating Available Space
First, measure the dimensions of your kitchen. Consider pathways and work areas. Ensure the island fits without blocking movement. Observe where natural light enters. This can affect how storage is used. Look at the height of cabinets and counters. This helps in planning vertical storage options.
Identifying Storage Needs
Think about what you need to store. Is it pots and pans? Or maybe baking sheets? Make a list of items to keep in the island. Prioritize the most used items for easy access. Consider how often you cook or entertain. This influences the type of storage required. Open shelves can display dishes. Closed cabinets hide clutter.

Credit: thecraftyblogstalker.com
Choosing The Right Materials
Selecting suitable materials ensures durability for your kitchen island storage. Wood offers a classic look and is easy to work with. Metal provides a modern touch and sturdy support for heavier items.
Adding storage to a kitchen island can dramatically enhance both its functionality and style. The key to a successful DIY project lies in choosing the right materials. This decision will impact not only the look and feel of your island but also how well it stands up to daily use. So, how do you decide which materials are best suited for your project?
Durability Considerations
When selecting materials, consider how they’ll hold up to the kitchen’s hustle and bustle. Kitchens are high-traffic areas, so durability is crucial. Materials like solid wood or stainless steel are excellent choices for their ability to withstand wear and tear. Think about the long-term maintenance of these materials. For instance, while wood offers a classic look, it might require occasional sealing to maintain its appearance. On the other hand, stainless steel is easy to clean but can show fingerprints easily.
Aesthetic Choices
Your kitchen island is a focal point, so aesthetics matter. Consider how the materials you choose will complement your existing kitchen decor. Are you going for a modern look, or do you prefer something more rustic? Think about color and texture. A white quartz countertop can offer a sleek, modern finish, while reclaimed wood can add warmth and character. Choosing materials that reflect your personal style can make your kitchen island not just a utility piece, but a statement of who you are. Mixing materials can also add visual interest. Pairing a wooden countertop with metal shelving can create a dynamic look that’s both functional and stylish. What combination speaks to you? As you embark on your DIY journey, remember that the right materials can transform your kitchen island into a centerpiece that blends seamlessly with your lifestyle. What will your choice say about you?
Building Storage Compartments
Transforming a kitchen island into a storage powerhouse is a savvy DIY project. Building storage compartments can maximize space and enhance functionality. By incorporating shelves and drawers, you can customize your kitchen island to meet your specific needs. This guide will walk you through the essential steps for creating organized storage solutions.
Installing Shelves
Shelves offer versatile storage options for a kitchen island. Start by measuring the interior space of your island. This ensures your shelves will fit perfectly. Choose sturdy materials like wood or metal for durability. Cut the shelves to size using a saw. Sand the edges to avoid splinters. Use a level to ensure the shelves are straight. Secure them with brackets or screws for stability. Consider adjustable shelves for added flexibility.
Creating Drawers
Drawers provide hidden storage, keeping your kitchen tidy. Begin by deciding the number and size of drawers needed. Use a tape measure for precise dimensions. Construct the drawer boxes from plywood or MDF. Assemble using wood glue and nails for a strong hold. Attach drawer slides to the sides of each box. Ensure they glide smoothly before securing. Install drawer fronts for a polished look. Use handles or knobs to complete the design.
Incorporating Pull-out Solutions
Adding storage to your kitchen island can enhance functionality. Incorporating pull-out solutions offers easy access to stored items. These features maximize space and help keep your kitchen organized.
Slide-out Shelves
Slide-out shelves bring convenience to your kitchen island. They let you access items without bending or reaching deep. Installing them is simple with basic tools. Measure the space inside the island for a perfect fit. Choose sturdy materials for durable shelves. Attach the tracks securely to ensure smooth movement. Slide-out shelves are perfect for pots, pans, and baking sheets. This keeps your island tidy and everything within reach.
Pull-out Bins
Pull-out bins are ideal for waste and recycling. They keep trash hidden yet easy to access. Choose bins that fit well in your island space. Install sliding tracks to allow bins to move in and out. This setup makes waste management efficient and clean. You can also use pull-out bins for storing bulk food items. Keep your kitchen tidy and clutter-free with this practical solution.
Maximizing Vertical Space
Boost kitchen functionality by adding storage to your island. Install shelves or hooks for pots and pans. Utilize vertical space with hanging racks for utensils.
Maximizing Vertical Space in your kitchen island is a game-changer. It allows you to make the most of your kitchen’s layout, especially if you’re working with limited floor space. Vertical storage transforms unused areas into practical spots, giving you more room to organize and declutter.
Hanging Racks
Imagine walking into your kitchen and finding your favorite utensils right where you need them. Hanging racks make this possible. They are perfect for keeping pots, pans, and ladles within reach. Installing a hanging rack on the side of your kitchen island is straightforward. You just need a drill, some screws, and a sturdy rack. Choose a rack that complements your kitchen style, whether it’s sleek stainless steel or rustic wood. Think about the convenience of having everything in one place. Hanging racks can free up drawer space, making your kitchen more efficient. Plus, they add a charming touch to your kitchen decor.
Stackable Storage
Stackable storage solutions are the secret weapon for maximizing vertical space. They help you organize items in layers, saving room and keeping your kitchen tidy. Opt for stackable baskets or bins that can be easily moved around. They are great for storing fruits, vegetables, or even cleaning supplies. When stacked, they create a neat tower of organized goods. Consider how much easier it is to find what you need when everything has its place. Stackable storage offers flexibility; you can adjust the height and arrangement to fit your needs. This is especially handy if your kitchen island is bustling with activity. Have you ever thought about how much vertical space you might be wasting? By using hanging racks and stackable storage, you can make your kitchen island a hub of functionality and style.
Utilizing Corner Space
Utilizing corner space in a kitchen island boosts storage options. It maximizes functionality without altering the island’s structure. Clever corner solutions can transform an underused area. This section explores smart ways to enhance your kitchen island.
Lazy Susan Installation
Lazy Susans make excellent use of corner space. They allow easy access to stored items. Install a Lazy Susan for a spinning storage solution. Choose a size that fits your corner cabinet. Opt for durable materials for longevity. Ensure smooth rotation by following the manufacturer’s instructions. This simple addition makes hard-to-reach areas accessible.
Corner Drawer Options
Corner drawers offer a unique storage solution. They pull out diagonally, utilizing corner space effectively. Consider installing corner drawers for their sleek design. These drawers provide a modern look and practical storage. Choose a style that matches your kitchen’s decor. Ensure the drawer mechanisms are sturdy and reliable. Corner drawers are both stylish and functional.
Integrating Hidden Storage
Enhance kitchen functionality with hidden storage in your island. Maximize space by adding shelves or drawers discreetly. Create a clutter-free environment while keeping essentials within reach.
Adding hidden storage to your kitchen island not only maximizes space but also keeps your kitchen looking sleek and organized. Imagine the surprise on your guests’ faces when they discover a hidden compartment or secret drawer seamlessly integrated into your island. This project doesn’t just boost functionality; it adds a touch of mystery and elegance to your kitchen.
Concealed Compartments
Concealed compartments are a clever way to stash away items you don’t use daily. These spaces can hold anything from extra dishware to small kitchen appliances. Consider installing lift-up panels on the sides of your island. These panels open to reveal hidden shelves without disrupting the island’s exterior look. It’s a great way to keep your kitchen clutter-free while ensuring everything has its own place. Think about how you can use vertical space inside your island. Tall, narrow compartments can store cutting boards or baking sheets. This not only frees up your counter space but also keeps these items within easy reach.
Secret Drawers
Secret drawers are perfect for storing items you want to keep out of sight yet easily accessible. Installing drawers with hidden pulls or touch-latch mechanisms can enhance the island’s minimalist look. You can store utensils, napkins, or even charging stations for your devices. Consider a personal experience: I once added secret drawers to my own kitchen island. It was a game-changer for organizing my spices. Now, they’re stored neatly, and no one knows they’re there until I show them. This small change made cooking more enjoyable and efficient. Ask yourself, what might you want to hide away in a secret drawer? The possibilities are endless, and the process is surprisingly simple. With a few tools and some creativity, you can transform your kitchen island into a versatile storage hub. Adding hidden storage is more than a DIY project; it’s an opportunity to tailor your kitchen to your unique needs. What hidden storage ideas will you bring to life in your kitchen island?

Credit: es.pinterest.com
Enhancing Functionality
Transforming a kitchen island with added storage enhances its functionality. Install shelves or cabinets to organize kitchen essentials. It simplifies access and maximizes space, creating a more efficient cooking area.
Enhancing functionality in your kitchen island is not just about adding extra storage—it’s about transforming the space to cater to your everyday needs. Imagine having everything you need right at your fingertips, whether it’s a cutting board for quick meal prep or hooks for your frequently used utensils. The goal is to make your kitchen island work smarter for you, turning it into a hub of efficiency. Let’s dive into some practical ways to enhance the functionality of your kitchen island, making it a versatile centerpiece in your cooking space.
Adding Cutting Boards
Adding cutting boards to your kitchen island is a game changer. Consider installing a slide-out cutting board right beneath the countertop. This makes it easy to access when you’re chopping veggies or slicing bread. You can also opt for a pull-out cutting board that doubles as additional counter space. It’s perfect for those moments when you need just a little extra room. The key is to choose a material that’s durable and easy to clean. Bamboo is a popular choice due to its sturdiness and aesthetic appeal. Think about how much easier meal prep could be with a cutting board that’s always in reach. Have you ever found yourself juggling items just to find space to chop? Solving this problem could streamline your cooking process significantly.
Installing Utility Hooks
Installing utility hooks is a simple and effective way to boost your kitchen island’s functionality. Place these hooks on the sides or underneath your island to hang utensils, towels, or even pots and pans. Utility hooks save you the hassle of digging through drawers or cabinets. Imagine having your go-to spatula hanging within arm’s reach while you’re cooking. This not only saves time but also keeps your workspace tidy. Choose hooks that complement your kitchen’s style—whether sleek stainless steel for a modern look or rustic wood for a cozy feel. How much time do you spend searching for utensils? You might find that hooks can offer a surprising solution. Enhancing your kitchen island’s functionality doesn’t require a complete overhaul. Simple additions like cutting boards and utility hooks can make a big difference in your daily routine. So why not try these DIY ideas and see how they improve your kitchen experience?
Decorative Storage Solutions
Decorative storage solutions can transform your kitchen island into a stylish hub. They blend functionality with aesthetics, offering both utility and charm. By incorporating visually appealing storage options, you can enhance the look and feel of your kitchen space. Let’s explore two effective ways to add decorative storage: open shelving displays and using decorative baskets.
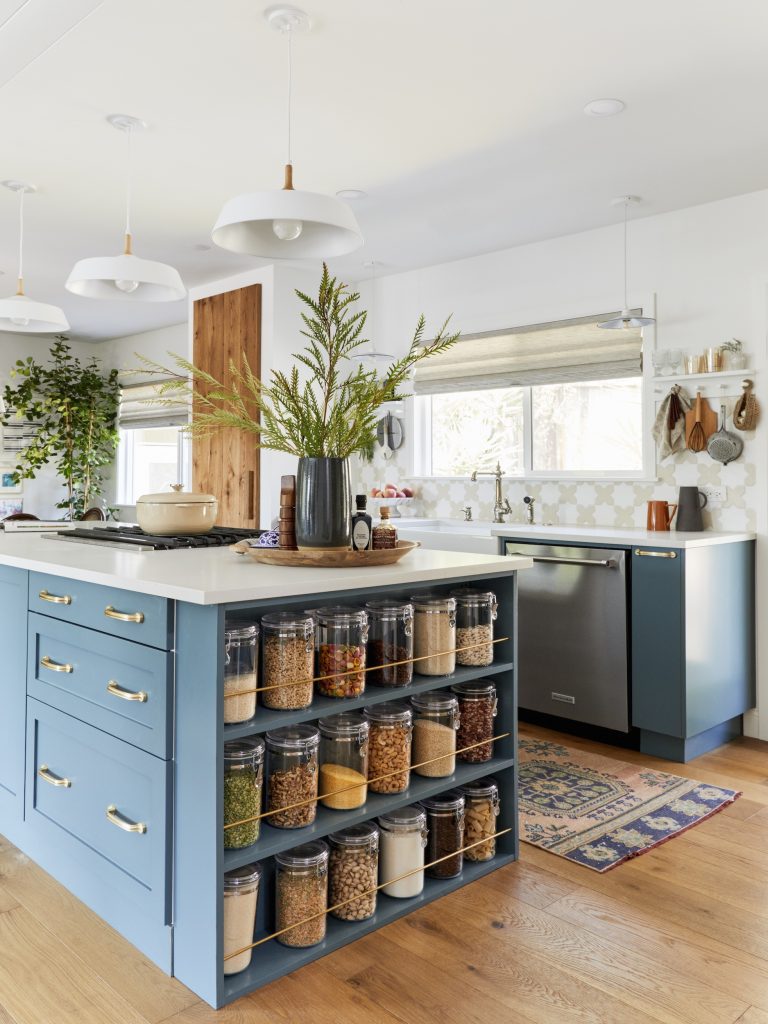
Open Shelving Displays
Open shelving provides easy access to kitchen essentials. It allows you to showcase beautiful items and add personality to your kitchen island. Choose shelves that complement your kitchen decor. Arrange dishes, cookbooks, and glassware to create an inviting display. You can mix colors and textures to make it visually interesting. Keep it organized for a clean and appealing look.
Using Decorative Baskets
Decorative baskets offer versatile storage options. They can hold fruits, linens, or utensils, adding warmth and texture. Choose baskets that match your kitchen’s style. Woven or metal baskets work well for a rustic or modern feel. Place them on or under the island for easy access. They not only store items but also add a cozy touch to your kitchen.
:strip_icc()/kitchen-white-decor-island-fdef6c0e-545f5098d64c45f19e55dd236114b2df.jpg)
Credit: www.bhg.com
Frequently Asked Questions
Can You Add Storage To A Kitchen Island?
Yes, you can add storage to a kitchen island. Incorporate cabinets, shelves, or drawers for extra space. Maximize functionality by integrating pull-out organizers or wine racks. Customize with hooks or baskets for easy access. Enhance your kitchen island’s utility while maintaining a stylish design.
How Do I Add Onto An Existing Kitchen Island?
To expand a kitchen island, measure the space first. Choose matching materials for the extension. Add extra cabinetry or a countertop. Ensure structural support, and secure all additions firmly. Consider professional help for complex installations.
What New Trend Is Replacing The Kitchen Island?
Peninsula designs are replacing traditional kitchen islands. They offer more space and flexibility for dining and storage. This trend enhances kitchen functionality and integrates seamlessly with open floor plans.
How To Keep A Kitchen Island Clutter Free?
Organize items in designated spaces. Use trays for grouping essentials. Store less-used items in cabinets. Regularly declutter and clean surfaces. Implement a “one-in, one-out” rule for new additions.
Conclusion
Adding storage to your kitchen island enhances its utility. A well-organized kitchen makes cooking enjoyable. Your DIY project can transform your space. Keep tools and ingredients within reach. Customize shelves or drawers to fit your needs. Choose materials that match your kitchen’s style.
Consider baskets for a rustic touch. Adding hooks can maximize vertical space. Enjoy a clutter-free, functional kitchen island. Your efforts will pay off with convenience and style. Happy organizing!